All things Raspberry Pi and Time Lapse

Posts tagged ‘video’

Finished and Uploaded!!

The video of the compilation of over 3 months is edited and uploaded! It has been 3 months since I setup the Canon PowerShot camera and Raspberry Pi in the greenhouse to watch the plants grow. And grow they did! The greenhouse starts out empty and in 15 seconds the plants are ceiling height. It was just under 90 frames total because some of the frames were too dark to use. And unfortunately some of the current images are pretty dark. But it worked!! And now I know what to change so that the images are not as dark for next time. Let me know what you think in the comments!

https://vimeo.com/57635944


Now I am looking at setting up for a year – as was my original goal…


Building a Gertboard

Finally edited the time lapse of building my Gertboard. It took about 4-5 hours from start to finish. I missed a small portion of soldering the header pins because the camera ran out of battery. The surface mount components were the hardest, but after that it was pretty straight forward and really fun! Here is the link to Vimeo and the Time Lapse (https://vimeo.com/56662328). After finishing the board I ran the test scripts that were written in C and it worked except for the motor controller. For some reason it would not turn the motor. Still working on figuring out what I am doing wrong there…

Finished shot of the Gertboard connected to the Raspberry Pi.

gertboard

Gertboard Arrived!

My gertboard arrived today! So I setup the soldering stuff and went to work on the practice board from Elenco that I bought from Amazon. And I found out real quick that the soldering iron that I have is not high enough quality. The tip did not get evenly hot which made it hard to solder. So I decided to buy a different soldering iron. I bought this one from Adafruit as they have Raspberry Pi and lots of other awesome electronics and DIY kits/parts. So I am assuming that since they say that this soldering iron is a good entry-level tool that it should be worth it. So now the only problem is waiting for that to ship…

I was looking up some instructional videos about the gertboard and came across these three from Element14.

Advice about assembly – Surface mount – Through hole

And as mentioned in this video at approximately 6:10 he says that there was only 10 jumper wires that came with the kit, and there are 12 LEDs. So there is not enough jumper cables to connect all 12 LEDs at the same time. So in addition to the soldering iron I bought a pack of these F/F jumper wires and also a pack of M/M jumper wires.  This gives me the option of creating my own M/F jumper wires by combining one of each. And these come in packs of 40 so I should have plenty!

Adafruit is a really awesome website. And Sparkfun is really amazing too!

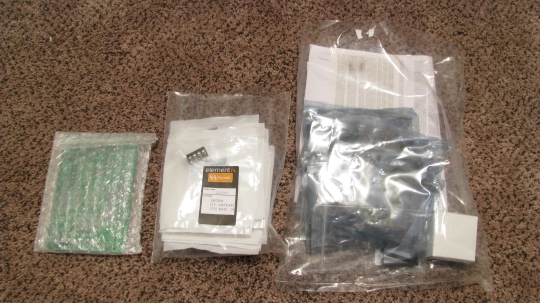
Here is a picture of what all arrived in the package from Newark. Gertboard on the left. Small components in bags in the center. And some of the bigger chips in anti-static bags on the right.

IMG_0914

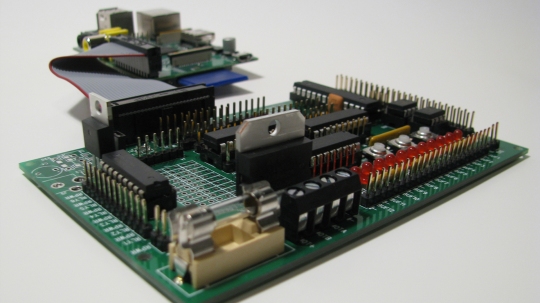
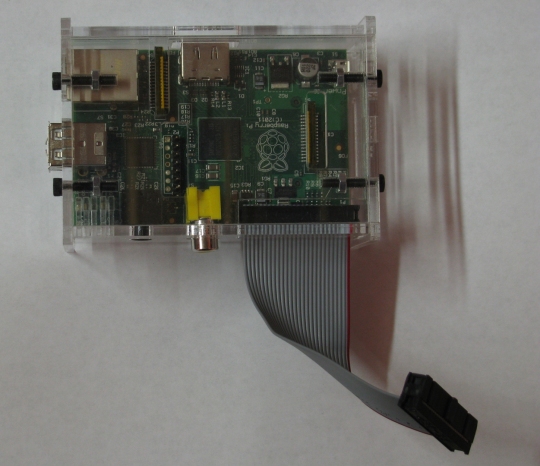
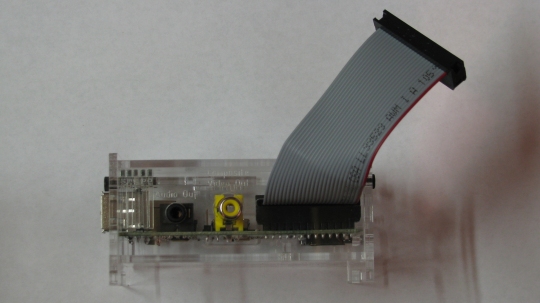
Next two images are of the GPIO cable coming out of the case that I posted about previously.

IMG_0909 IMG_0910

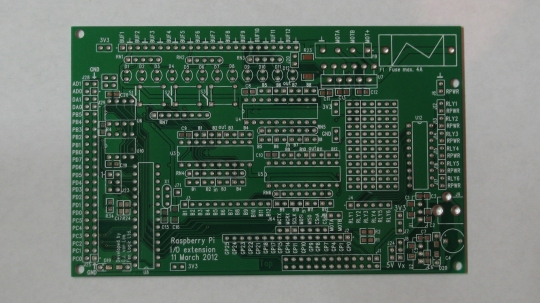
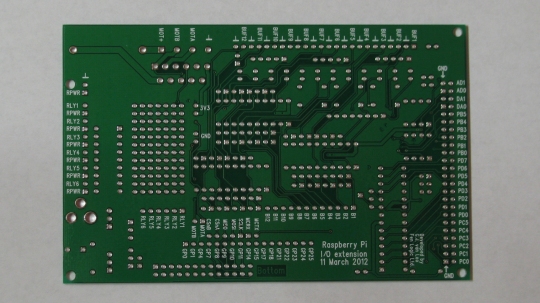
The next two images are of the bare Gertboard. First one is the top of the board, and the second is the bottom of the board.

IMG_0912 IMG_0913

Pro Time Lapses

This video on Vimeo is absolutely amazing! It is a combination of day and night shots that were taken in Yosemite National Park. This next video is also a collection of shots from Arizona and Utah. Both of these videos are absolutely worth the time to watch them. The second video is by a guy named Dustin Farrell and he has some great tutorials on shooting and post processing.

Yosemite – https://vimeo.com/35396305

Arizona and Utah – https://vimeo.com/29950141

Tag Cloud